Wired Camera Installation Process Made Easy
There’s something reassuring about knowing your home is being watched over, isn’t there? Wired camera systems, though a bit more effort to install, offer reliability that wireless ones sometimes can’t match. Statistics suggest that 60% of people feel a greater sense of security with cameras in place—proof that they’re more than just gadgets.
But the process of setting them up? That’s where it can get tricky. It’s not just about plugging things in; it’s about understanding placement, wiring, and making it all work together. Curious how to do it right? Stick around for a step-by-step guide that makes it manageable.
Key Takeaway
- Choose the right spots for your cameras to cover all areas.
- Gather all the tools and cables you need before starting.
- Always test your cameras after installation to make sure they work.
Planning the Installation
Credits : Carson Miller
- Identify Camera Locations: The first thing to do when setting up wired cameras is to figure out where they should go. Picking the right spots is super important because it helps cover all the areas you want to watch. Start by looking for blind spots—places where something could happen without being noticed, like behind trees or in the corners of your yard. Cameras work best when they’re placed up high.
This way, they can see more and catch better details. Think about the important areas, like doors and windows, since those are the main ways people get in. Also, check how much the camera can see (called the field of vision). If one camera can cover a big area, you might not need as many. Taking time to plan this out will make sure your cameras do their job well.
- Map Out Wiring Routes: Once you know where the cameras will go, the next step is figuring out how to run the wires. This part can be tricky, but planning ahead makes it easier. It’s a good idea to hide the wires in walls or along baseboards. This keeps things looking neat and also protects the wires from getting damaged.
Look for simple paths to run the cables—places where they won’t get in the way or cause someone to trip. Using walls or ceilings can help keep everything tidy. Don’t forget to think about how far the cameras are from the recording box.
Shorter wires work better because there’s less chance of losing the signal. And make sure you know how you’ll get power to the cameras. A little extra planning here will save you a lot of trouble later on.
Gathering Necessary Tools and Materials
Before starting, it’s smart to have everything you need ready to go. This saves time and makes the whole process a lot easier. Here’s a list of what to gather:
- Cables: Picking the right cables is super important. For most wired camera setups, RG-59 Siamese cables or Cat5e Ethernet cables work great. RG-59 cables handle both video and power, while Cat5e cables are better if your cameras need internet.
Measure how much cable you’ll need by checking the distance from each camera to the recording box. It’s always a good idea to buy a little extra—just in case you make a mistake or need more than you thought. The right cables make sure your cameras work like they should.
- Tools: You’ll need some basic tools to get the job done. A power drill is a must for making holes to mount cameras and run wires. Fish tape helps you pull cables through walls. Wire strippers are handy for peeling off the coating on wires so you can connect them.
Crimping tools are needed to secure the ends of the cables. Electrical tape is great for covering any exposed wires, and cable clips keep everything neat along walls or ceilings. Don’t forget a cable tester to check if all your connections are working. Having these tools ready will save you a lot of frustration.
- Mounting Hardware: Finally, make sure you have all the mounting parts. This usually includes screws and brackets that come with the camera kit. These are super important because they hold the cameras in place.
Without them, the cameras might not stay up or could even fall. Double-check that you have everything organized before you start. Having the right tools and materials ready makes installing the cameras way less stressful.
Safety Precautions
- Turn Off Power: Before doing anything with wires, turning off the power is a must. This simple step can stop accidents from happening and keep everyone safe. Electricity can be dangerous, especially when working with cameras that need to be plugged in.
Shutting off the power helps prevent electric shocks, which can be really serious. Start by finding the circuit breaker for the area you’ll be working in. Flip the switch to turn it off, and mark it so everyone knows not to touch it.
Next, it’s smart to double-check that the power is actually off. A voltage tester is a handy tool for this. Just touch it to the wires, and it’ll tell you if there’s still electricity running through them. It’s quick, easy, and gives you peace of mind. If someone else is around, remind them that the power is off so they don’t accidentally turn it back on while you’re working.
Once you’re sure the power is off, you can start installing the cameras. Keep your workspace clean—tripping over tools or wires can cause accidents, too. When you’re done, check everything one more time before flipping the power back on. This makes sure everything is secure and ready to work. Following these steps will keep the process safe and stress-free for everyone involved.
For a smooth and secure installation process, Shielded Residence emphasizes turning off the power before working with wiring. Safety remains our top priority, and we recommend using tools like voltage testers to ensure all is safe before proceeding.(1)
Drilling Access Holes
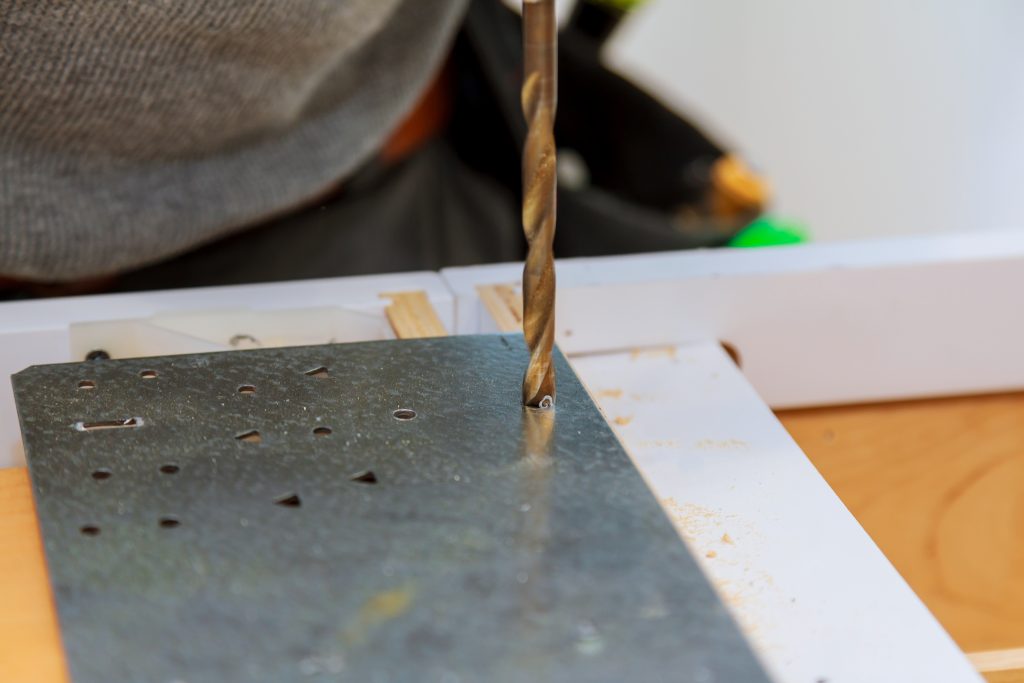
Using a power drill to make holes is an important part of setting up wired cameras. These holes let the cables go through walls or ceilings without getting stuck. But it’s important to pick the right drill bit for the job. If the bit is too big, the hole might end up way larger than needed, which can cause problems later. The hole should be just the right size so the cables can fit through easily without being too loose.
Before you start drilling, mark the exact spots where the holes need to go. This helps make sure everything lines up right. It’s always better to measure twice and drill once—fixing a mistake can be a real headache. When you’re ready to drill, keep your hand steady and press evenly. This helps make clean holes and avoids damaging the wall or ceiling. If you’re drilling into a wall, be extra careful not to hit any hidden wires or pipes. That could cause a whole new set of problems.
Once the holes are drilled, check them to make sure they’re clear. Dust and little bits of debris can get in the way when you’re trying to run cables, so clean them out. If the hole isn’t big enough, you might need to use a slightly larger drill bit to adjust it. Taking your time with this step will save you trouble later on. Well-drilled holes make running the cables easier and help the whole installation go smoothly.
Running Cables
- Using Fish Tape: Fish tape is a super helpful tool for pulling cables through walls or ceilings. Start by sliding the fish tape into the holes you drilled earlier. If the holes are the right size, it should go through without much trouble. Once it’s in place, attach the cables to the end of the fish tape.
You can use electrical tape or zip ties to make sure the cables stay secure and don’t slip off. After that, gently pull the fish tape back through the hole, bringing the cables along with it. Go slow and steady so you don’t accidentally damage the cables. If the cables are really long, having someone on the other side to guide them can make things a lot easier. Working together can save time and effort.
- Secure Cables: Once the cables are in place, it’s time to secure them so they don’t move around. Cable clips or ties work great for this. Start by placing the clips along the path where the cables run, spacing them out evenly to keep everything neat and supported. If you’re using cable ties, wrap them around the cables and tighten them so they stay snug against the wall or ceiling.
Keeping the cables organized not only looks better but also helps prevent tangles or damage. Plus, if someone needs to adjust or add cameras later, they won’t have to deal with a messy bundle of wires. Spending a little extra time now to secure the cables properly will make the whole system easier to manage and more dependable in the future.
Splicing and Connecting Wires
Now it’s time to splice and connect the wires. Start by grabbing a pair of wire strippers. These are special tools that help you remove the plastic coating (called insulation) from the ends of the wires. Carefully strip about half an inch of insulation off each wire. Be gentle—if you press too hard, you might accidentally damage the wire underneath.
Once the ends are bare, you can connect them. There are two main ways to do this. You can use connectors, which are little pieces that hold the wires together tightly. If you don’t have connectors, you can twist the wires together by hand. Just make sure the copper parts of the wires are touching firmly.
After the wires are connected, it’s really important to secure them. Wrap electrical tape around the connection points. This tape acts like a shield, keeping the wires safe and preventing something called a short. A short happens when electricity flows the wrong way, which can cause problems—or even damage your system. Wrapping the tape tightly around the wires helps keep everything in place and safe.
To double-check that the connections are good, use a multimeter or a cable tester. These tools can tell you if electricity is flowing through the wires the way it should. Just follow the tester’s instructions to check each connection.
If everything looks good, you’re ready to move on. Taking your time to make solid connections now will save you headaches later. Good splicing and connecting mean your cameras will work the way they’re supposed to.
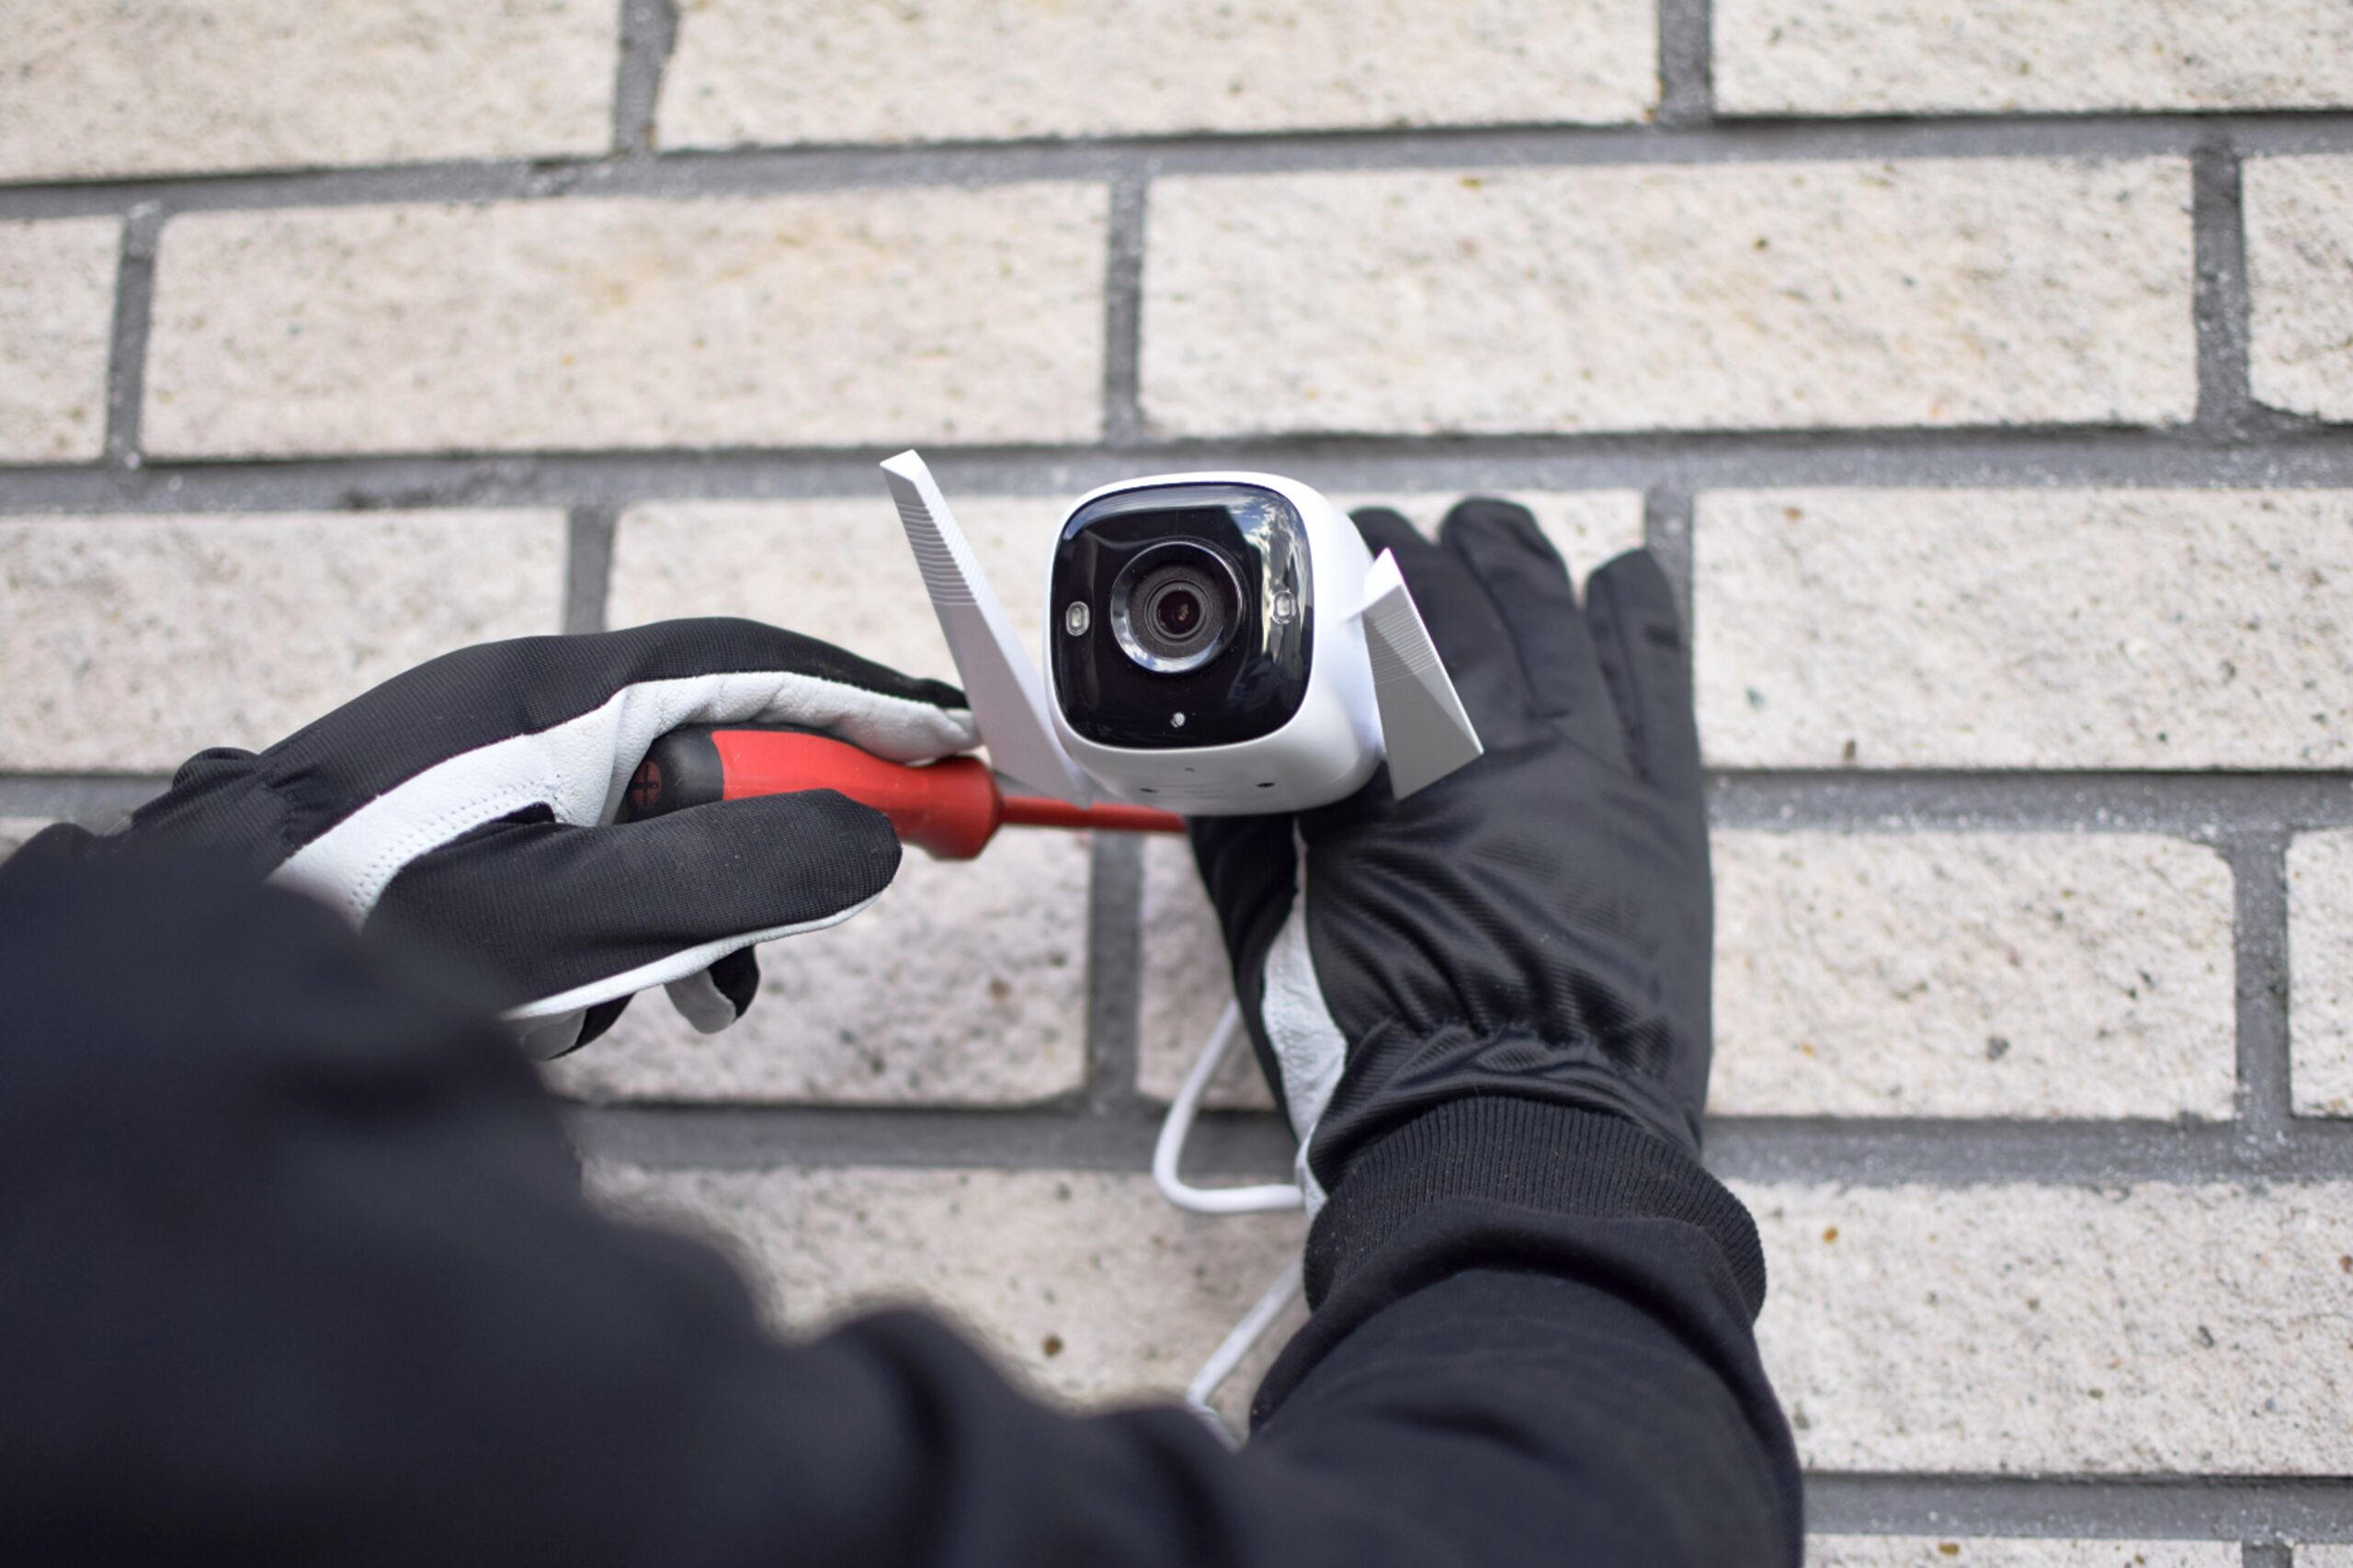
Mounting Cameras
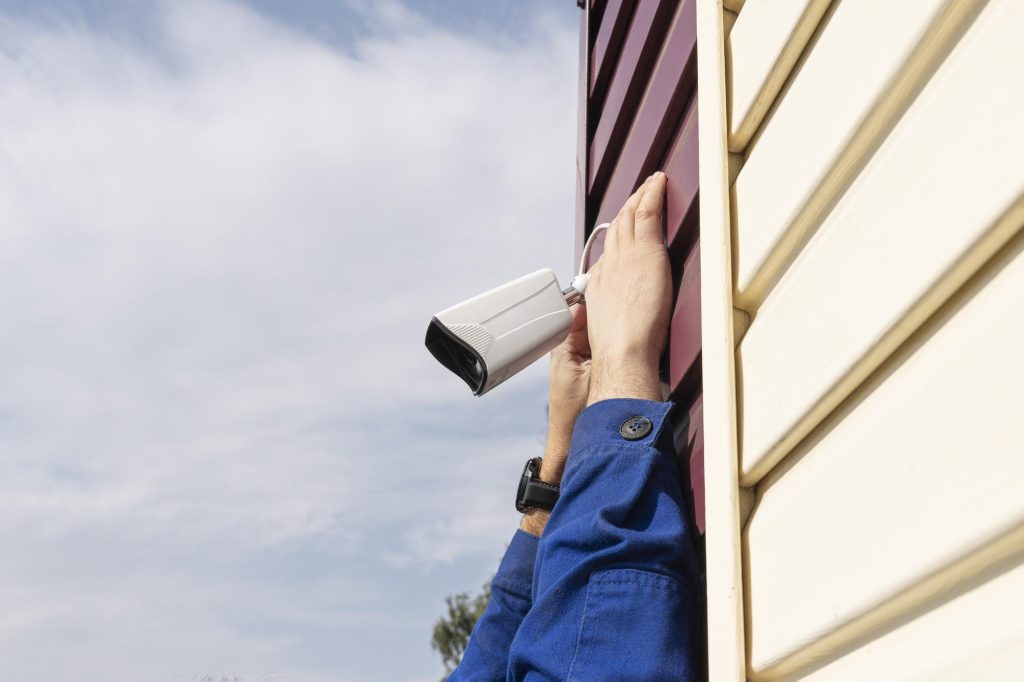
Now it’s time to get the cameras up in their spots. Start by grabbing each camera and placing it where you planned earlier. Stick to the layout you worked out—it’ll save you from second-guessing later.
Make sure the cameras are aimed to cover the areas you want to watch. Try not to point them directly at bright lights or anything that might block their view. Glare or obstacles can mess up the picture, and you want the cameras to see clearly.
Once the cameras are in position, it’s time to secure them. Use the screws and brackets that came with your kit. First, mark where the screws should go. This helps make sure the cameras will be straight and steady. Then, use a power drill to make small pilot holes. These holes guide the screws and make it easier to attach the brackets. After that, screw the brackets into the wall or ceiling carefully.(2)
With the brackets in place, you can hang the cameras on them. Make sure they’re snug and won’t wobble. Once they’re up, take a minute to adjust the angles. This part is really important—you want to tilt the cameras so they’re covering the exact areas you need. A little adjustment here can make a big difference in what the cameras can see.
Finally, step back and take a good look at your work. Check the angles and make sure everything looks just right. If something seems off, now’s the time to fix it. Properly mounted cameras will give you clear views and help keep everything safe. It’s worth taking the extra time to get it just right.
Concealing Wires
To keep things looking neat, it’s a good idea to hide the wires properly. One way to do this is by using conduits or wall plates. Conduits are like little tubes that hold the wires and keep them organized. They can be attached along walls or ceilings, making sure the wires stay out of sight. Wall plates are another option—they cover the holes where the cables go in or out of the walls. Both of these can make the setup look clean and finished.
Hiding the wires doesn’t just make things look better—it also keeps the cables safe. Exposed wires can get snagged, cut, or damaged, which might cause problems later on. When the wires are tucked away, there’s less chance of accidents. Plus, it just feels better knowing everything is secure and in place.
Before calling it done, take a moment to check that all the wires are hidden. Step back and look at the area. A clean, organized setup not only looks professional but also makes life easier if you ever need to fix something later. No messy wires to untangle! Taking the time to conceal the wires now will save you trouble down the road and make the whole installation look top-notch.
Powering Up
After hiding the wires, it’s time to get the cameras powered up. This is the step where everything starts to come together. First, check all the connections to make sure they’re nice and tight. Loose connections can cause problems, like cameras not turning on or working right. It’s always a good idea to follow the instructions that came with your camera kit to connect the power correctly.
Once everything is hooked up, head to the circuit breaker and carefully turn the power back on. Now the cameras should start getting electricity. Pay attention—listen for any weird sounds or look for anything that doesn’t seem right. If the cameras don’t turn on or something feels off, don’t panic. Just turn the power off again and double-check all the connections.
This step is super important because it makes sure the whole system is working properly. Taking a little extra time now to make sure everything is set up right can save you a lot of trouble later. A quick check here and there can make all the difference in having a reliable security system.
Testing the System
Once the power is on, it’s time to test the system. This step is super important because it shows if everything is working the way it should. Start by checking each camera one by one. Look at the video feed to make sure the picture is clear. If something looks blurry or off, it might mean the camera needs a little adjustment.
Next, check that all the cameras are recording properly. Most systems have an app or a monitor where you can watch the live video feeds. This makes it easy to see what each camera is capturing. If the quality doesn’t look right, try tweaking the camera angles again to get a better view.
Also, take a moment to make sure the cameras are covering the areas you planned for. This is your chance to fix anything before wrapping up. Testing the system now will save you from surprises later and make sure your cameras are doing their job. A quick check gives you confidence that everything is ready to go when you need it most.
Shielded Residence highlights the importance of thoroughly testing your system. Checking live video feeds and ensuring all cameras are recording properly ensures that your security setup works as intended from the start.
Final Inspection
The last step is to do a good, careful check of the whole setup. This is important to make sure everything is safe, secure, and working the way it’s supposed to. Start by looking at the camera mounts. Give them a little wiggle to make sure they’re tight. If a mount is loose, the camera might move and lose its view, which could mess up your coverage.
Next, go over all the connections you made during the installation. Check that they’re snug and not damaged. Then, take a look at the wires. Are they hidden and organized? If you see any wires sticking out, you might want to adjust them or add more clips or conduits to keep things neat. A clean setup not only looks better but also keeps the system safer from damage.
If you spot any problems during this final check, now’s the time to fix them. It’s easier to handle little issues now than deal with bigger ones later. Once everything looks solid and in place, you’re done! Your security system is ready to do its job and keep the space protected.
Conclusion
Setting up wired cameras isn’t something you rush through—it takes some planning and patience. From choosing the right spots to running cables and testing everything, each step matters. Taking the time to do it right means you’ll have a system that not only works well but also looks clean and professional.
A good security setup gives peace of mind, knowing your home or space is being watched over. So, whether it’s adjusting camera angles or neatly hiding wires, the effort is worth it. Following these steps will leave you with a reliable system that helps keep everyone safe and secure.
With Shielded Residence, setting up wired cameras doesn’t have to be overwhelming. Our professional guidance ensures that each step, from planning to final testing, leaves you with a system designed to protect what matters most. Safety and peace of mind are just a call away.
FAQ
What is the difference between a wired security camera and a wireless camera system?
Wired security cameras connect directly to a power source and transmit data through cables like ethernet cables, while wireless cameras use battery-powered or Wi-Fi connections. Wired systems like CCTV cameras or IP cameras are reliable but require running wires through walls, whereas wireless cameras offer ease of installation but may need regular charging or cloud storage.
How do I install an outdoor security camera near my front door?
To install an outdoor camera by your front door, you’ll need to drill holes for mounting brackets, ensure access to a power outlet or use power cables, and place the camera at least 8-10 feet high. Avoid blind spots and protect the cables with conduit pipes or PVC conduit to ensure durability.
Can I use PoE cameras for an indoor security camera setup?
Yes, PoE cameras are ideal for indoor setups. They transmit power and data over a single ethernet cable, making installation easier. PoE switches or injectors can supply power, eliminating the need for separate power adapters. These systems work well with network video recorders for storing video footage.
What tools do I need for running wires during a wired security camera installation?
You’ll need tools like a crimping tool, fish tape for pulling wires through walls, spade bits or drill bits for creating holes, and PVC conduit to protect the cables. Ensure you plan cable runs carefully to avoid drilling holes in the wrong spots and minimize visible wires.
How can I avoid blind spots when placing cameras for video surveillance?
Place cameras with a wide field of view, like dome cameras or PTZ cameras, in strategic locations like entry points or parking areas. Use tools like a mounting template to ensure proper camera placement and angle. Avoid placing cameras in areas with obstructed light sources or potential intruders might hide.
What is the role of an NVR system in a wired security camera setup?
An NVR system (Network Video Recorder) records and stores footage from IP cameras. It offers real-time monitoring, remote viewing on mobile devices, and night vision capabilities. Combined with PoE IP cameras, it provides seamless video and power transmission for surveillance.
Should I use coaxial cables or ethernet cables for my security camera system?
The choice depends on your camera type. Analog cameras use coaxial cables for video and power, while IP security cameras or PoE security systems use ethernet cables. Ethernet cables are more versatile, supporting higher resolutions and features like live view or real-time alerts through a smartphone app.
How do I protect security camera wires from outdoor elements?
Use conduit pipes, such as metal or PVC conduit, to shield wires from weather damage. Keep an eye on wire placement to avoid water exposure. Secure the wires to walls or ceilings using cable clips and plan cable runs to minimize exposure to sunlight or extreme conditions.
What are the benefits of a wired security camera system for large areas?
Wired systems, like CCTV systems or wired IP cameras, offer stable video transmission and high image quality, making them ideal for monitoring large areas. With features like night vision and real-time footage, they provide reliable surveillance without interruptions from Wi-Fi or battery issues.
Can I install security cameras myself, or should I hire professional installation?
DIY installation is possible for users familiar with running wires and setting up systems like PoE cameras or DVR boxes. However, professional installation ensures proper placement, avoids potential wiring mistakes, and includes tech support for system configuration. Evaluate your comfort level before deciding.
References
- https://www.howtogeek.com/307625/how-to-install-a-wired-security-camera-system/
- https://www.eufy.com/blogs/security-camera/security-camera-wiring